You can determine if your walls need re-plastering by checking for large cracks, crumbling texture, or a hollow sound when the surface is tapped. If the plaster is blowing away from the brickwork or showing signs of persistent damp, a full replacement is often required to ensure a stable and decorative finish.
You have noticed something is not quite right with your walls. Maybe there are cracks you keep filling that come back, patches that sound hollow when you tap them, or a surface so uneven that no amount of paint can hide it. These are not just cosmetic frustrations; they are signals that your plaster may be failing, and ignoring them often leads to bigger, more expensive problems down the line. Knowing the difference between a wall that needs a simple application of filler and one that needs a full re-plaster can save you time, money, and a great deal of stress. In this guide, we cover the key signs to look for, what causes plaster to fail, and how to choose the right solution for your home.
How to Tell If Your Walls Need Re-plastering
If you've found yourself tapping walls, squinting at cracks, or wondering why that damp patch keeps coming back after painting, you're asking exactly the right question. It's one of the most common concerns we hear from homeowners across Norfolk, particularly in the period properties and older terraces found in Hunstanton, Kings Lynn, and along the North Norfolk coast, where plasterwork can be decades or even over a century old. The good news is that not every imperfection means you're facing a full re-plaster. But some signs genuinely do mean it's time to act. This guide walks you through what to look for, so you can make an informed decision.
5 Clear Signs Your Walls Need Re-plastering

Knowing the difference between a wall that needs attention and one that genuinely needs re-plastering can save you significant time and money. Here are the five signs that strongly suggest it is time to act.
1. A hollow or drumming sound when you tap the wall
Run your knuckles across the surface in a grid pattern. A solid thud indicates the plaster is still bonded to the substrate. A hollow, drum-like sound means it has lost its mechanical key and is effectively floating. This separation is particularly common in the three-coat lime plaster systems found in Victorian and Edwardian terraces across Kings Lynn and Swaffham, where the scratch coat, float coat, and finish can delaminate independently over time. Once the key is gone, no amount of surface treatment will fix it.
2. Cracks that form a map or run diagonally from corners
Not all cracks are equal. Fine diagonal cracks running from the corners of door frames or windows often indicate localised structural movement. A network of interconnected hairline cracks covering a larger area, sometimes called map cracking or crazing, is a different problem entirely. It typically means the plaster itself is shrinking, carbonating, or has simply reached the end of its usable life. On older lime plaster, cracking can accelerate once moisture gets into the system.
3. Damp patches or staining that return after painting
If you have painted over a damp patch and it reappears within weeks, the moisture is trapped within the plaster body. In properties on the North Norfolk coast and around Hunstanton, salt damp is a compounding factor; soluble salts migrate through the wall and crystallise just beneath the surface, pushing the plaster away from the inside out. Painting over this repeatedly does nothing to address the underlying failure.
4. Bubbling, flaking, or visibly blown sections
Blistering or flaking paint on a plastered wall is not always a paint problem. Press gently on a bubbled area; if the surface feels soft, spongy, or moves independently of the wall, the plaster beneath has blown. Blown plaster has physically separated and poses a safety risk in larger sections, particularly on ceilings.
5. Surfaces that remain wavy or uneven regardless of filling
If you are asking yourself whether your walls need re-plastering because filler keeps cracking out or the surface still looks uneven after multiple attempts, the substrate itself is the problem. No skim of filler will create a stable finish over plaster that is shifting or degraded. This is one of the clearest indicators that a fresh start is the only practical solution.
Signs That Do Not Always Mean Re-plastering
Seeing the signs above can be alarming, but it is worth being clear: not every wall imperfection means a full re-plaster is required. Some issues look worse than they are.
Hairline cracks from seasonal movement are extremely common, particularly in properties that go through significant temperature changes between winter and summer. A single fine crack running vertically or following a join between plasterboard sheets is usually the wall breathing rather than failing. A flexible filler, properly applied and painted over, is all these typically need.
Minor surface marks, scuffs, or a tired finish do not indicate structural failure. If the plaster beneath sounds solid when tapped and there is no sign of damp, a skim coat applied over the existing surface will produce a fresh, smooth result without the disruption or cost of stripping back to brick.
Small isolated patches of damage, perhaps where a fixture was removed or a previous repair has failed in one spot, can usually be cut out and patched by a skilled plasterer. This is a common and cost-effective fix for localised problems.
The honest answer to whether your walls need re-plastering is that a visual inspection rarely tells the full story. A professional assessment from an experienced plasterer takes minutes and costs nothing in most cases, but it can save you from either unnecessary work or from underestimating a genuine problem. Our plastering services across Norfolk cover exactly this kind of diagnostic visit, so you get an accurate picture before any decisions are made.
What Causes Plaster to Fail in the First Place
Understanding why plaster fails makes it much easier to diagnose what you are actually dealing with on your walls.
Age and natural deterioration is the most straightforward cause. Lime plaster, common in pre-1950s properties across Swaffham, Kings Lynn, and the coastal villages, was designed to flex and breathe. Over many decades, the binders break down, the plaster becomes more brittle, and its bond to the substrate weakens. This is not a sign of poor original workmanship; it is simply the material reaching the end of its working life.
Water ingress and damp are the most damaging accelerants. A leaking roof, failed pointing, or a previously unresolved rising damp issue does not just stain plaster; it physically degrades the bond between coats and introduces the soluble salts mentioned earlier. Properties around Hunstanton, Brancaster, Wells-Next-The-Sea & Cromer face a particular challenge here, as the costal environment carries higher ambient moisture levels year-round, which can accelerate deterioration noticeably compared to inland homes around Fakenham & wider Norfolk.
Incompatible DIY repairs cause more problems than many homeowners realise. Filling a section of old lime plaster with a hard gypsum or cement-based product creates a rigid patch within a flexible system. The two materials move at different rates, and the repair fails, often taking surrounding plaster with it.
Structural movement and poor original application, including insufficient suction control or inadequate key preparation, round out the main causes. Any of these can compound each other, which is why a single wall sometimes presents several failure types at once.
Full Re-plaster or Skim Coat: Which Do You Actually Need

Once you have identified the cause of your plaster problems, the next question is usually whether you need a full replaster or simply a skim coat. The two are frequently confused, and the distinction matters both for budgeting and for planning how long you will be without a usable room.
A skim coat, sometimes called a re-skim, applies a layer of finishing plaster, typically 2 to 3mm, over the existing plaster surface. It does not involve removing anything. The work is relatively quick; a single room can often be completed in a day, and because there is far less mess and debris, disruption is minimal. Drying time before decorating is also shorter, usually 3 to 4 days. A skim coat is the right choice when the plaster beneath is structurally sound, bonds solidly to the wall, and simply has a tired, marked, or slightly uneven surface that you want to refresh.
A full re-plaster means stripping everything back to the brick, block, or original substrate and rebuilding from scratch with a bonding or browning undercoat followed by a finishing coat, alternatively dot & dabbing the existing walls maybe required. This is the appropriate route when plaster has blown, suffered damp damage, or is too old and unstable to build upon reliably. Stripping a room generates significant dust and debris, typically taking one to two days for the removal and preparation alone, with plastering following on top of that. Allow a full week of drying time before any decorating begins.
If you are still asking yourself whether your walls need re-plastering or just a skim, the hollow-sound test described earlier is your most reliable guide. Sound plaster that taps solid is a skim candidate; anything that drums or flexes needs to come off.
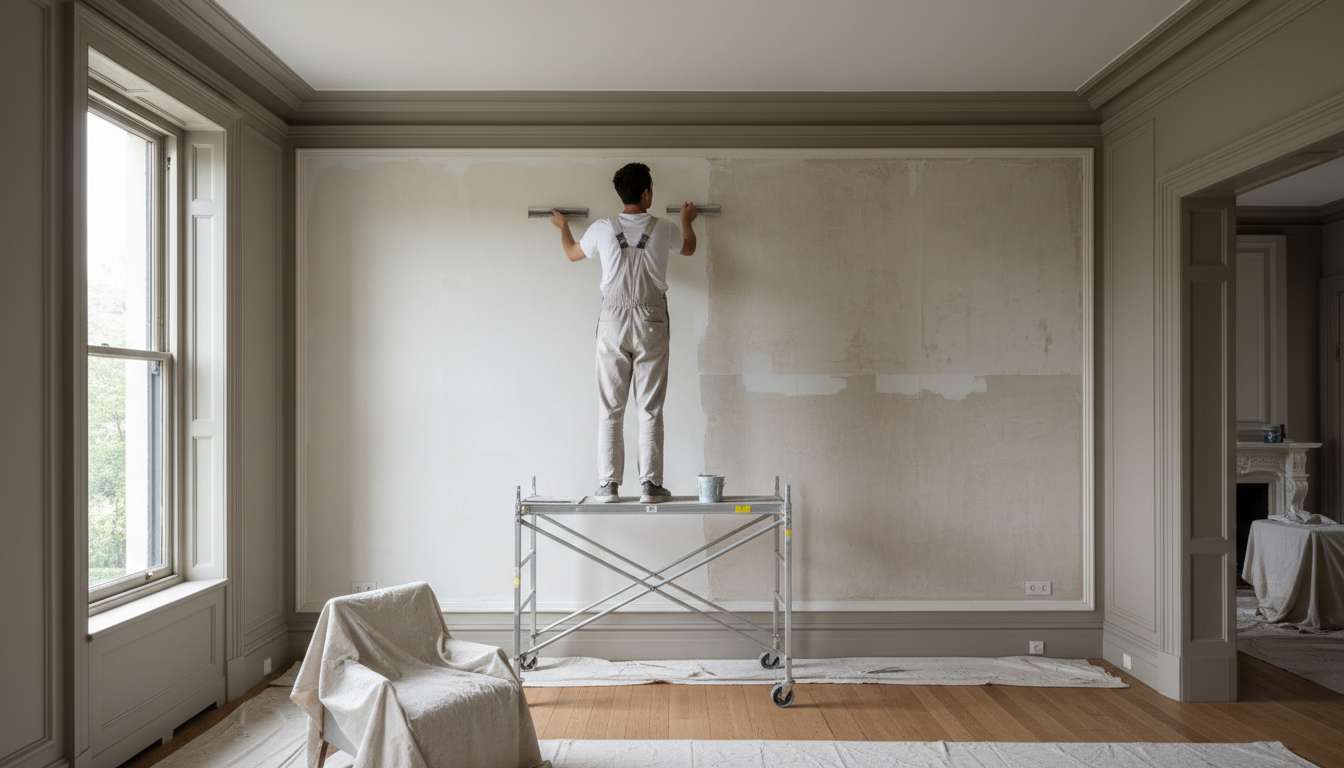
What Happens During a Re-plastering Job

Knowing you need a re-plaster is one thing; understanding what actually happens on the day helps you plan properly and avoid surprises.
The job begins with removing the old plaster back to the bare substrate. This is the dustiest, noisiest part of the process, and it is worth protecting furniture and flooring before work starts. Once the walls are stripped, the substrate is inspected closely. Any active damp, mould, or salt contamination must be addressed at this stage rather than plastered over; skipping this step is one of the most common reasons re-plastering work fails prematurely.
With the substrate prepared, a bonding coat or dot & dab of plasterboard is applied. This coat ( bonding ) builds thickness, evens out the surface, and provides the mechanical key the finishing plaster needs to adhere correctly. On older brick or stone found in many North Norfolk properties, suction control at this stage is particularly important. The finishing coat follows once the undercoat has firmed up, and it is this layer that produces the smooth, flat surface ready for decoration.
Drying time is where many renovation timelines come unstuck. Newly plastered walls need four to six days before painting. Rushing this leads to peeling, poor adhesion, and wasted decorating work. Because painting and decorating in Norfolk is part of what Norfolk Plaster offers alongside the plastering itself, clients across the region can plan both stages with a single team rather than coordinating separate trades around each other.
How to Find a Reliable Plasterer in Norfolk
Once you have worked through the signs, identified the cause, and understood what the job involves, the practical question is who to trust with the work. For plastering specifically, experience with both modern gypsum systems and traditional lime plasterwork matters more than for most trades. A plasterer who works mainly on new builds may not have the right approach for a Victorian terrace in Kings Lynn or a period cottage on the North Norfolk coast, where the substrate, movement characteristics, and material compatibility are all quite different.
When gathering quotes, ask directly about experience with period properties and request written, itemised breakdowns rather than verbal estimates. Two quotes is a sensible minimum, but treat an unusually low price with caution; cutting costs on preparation and materials is not visible until the finish starts failing six months later.
Norfolk Plaster covers Hunstanton, Kings Lynn, Swaffham, Fakenham, Norwich, and the wider North Norfolk coast, offering plastering services across Norfolk through to finished painting and decorating in Norfolk, so the entire project moves forward with one team who already know the work.